Pages

Showing posts with label Chicken. Show all posts

Wednesday, February 27, 2013

Meal Planning Part 3

This is part 3 of my series on meal planning. Last time I shared two weeks worth of meals, recipes, and a shopping list. This time I'm going to share two more weeks!
 
For the last part of February, here's what we've had:
 
Week 3
Day 1/2: Taco Soup
Day 3/4: Baked Ziti
Day 5/6: Baked Chicken and Veggies
 
Week 4
Day 1/2: Asian Stir Fry
Day 3/4: Red Beans and Rice
Day 5/6: Taco Night
 
Like I mentioned before, I have a lot of things that I keep on hand. Some things that I did not have to buy this time because I already had them were rice, tortillas, soy sauce, rice wine vinegar, balsamic vinegar, jar of minced garlic, cajun seasoning, chicken, spices, and veggies (The chicken, tortillas, and veggies, I bought the previous week).
 
Shopping List
Cost: Approximately $40
  • 2 lb. ground beef/turkey
  • 2 cans black beans
  • 3 cans diced tomatoes
  • 1 can dark kidney beans
  • 1 can light kidney beans
  • 1 bell pepper
  • 1 onion
  • 1 jar of salsa
  • 1 package taco seasoning
  • 1 small container part skim ricotta cheese
  • 1 jar spaghetti sauce
  • Ziti pasta
  • 1 bag shredded cheese of your choice (used for ziti and taco's)
  • Vegetables of your choice
  • Soy sauce and Rice wine vinegar
  • Frozen corn
  •  
Recipes
 
Taco Night: You can find this in my Part 2 post
 
Baked Ziti: I use the same process for baked spaghetti found on the Part 2 post, except in between the layers I add a layer of ricotta cheese. This recipe is very versatile and you can add in vegetables, your favorite pasta and sauce, and made totally different meals.
 
Baked Chicken and Veggies: This is one of Dan's favorites. He works out a lot and craves healthy foods [I know, weird! :)]. I place two-three chicken breasts in a small casserole dish and coat with 1 tbsp. olive oil, 2 tbsp. balsamic vinegar (or a favorite vinegarette bottled dressing), salt and pepper, and 1 tsp. garlic. Then throw in vegetables of your choice. I ususally put in frozen broccoli, frozen green beans, and some fresh carrots. Bake at 350 until chicken is cooked through.
 
Asian Stir Fry: Dice 2-3 chicken breasts into bite sized pieces. Cut vegetables that you want to use (my favorites are broccoli, carrots, sugar snap peas, and corn) into small pieces. In a small bowl, mix together 1/4 c. soy sauce, 1 tbsp. rice wine vinegar, 1 tsp. garlic, and some hot sauce. Start with a large skillet with some olive oil on medium high heat. Add chicken and cook for about 3 minutes. Add in vegetables and sauce. Cook until vegetables are tender and chicken is cooked through. Serve over rice.
 
Red Beans and Rice: This is one of our vegetarian favorites although sometimes I add smoked sausage. I don't claim to know anything about cajun/Louisana cooking or that this is even cajun at all. It would probably be a disgrace down there, but we like it! Saute 1 bell pepper, 1 onion, and 1 tsp. of garlic in a skillet with olive oil until tender. Add in 1 can of diced tomatoes, 2 cans of kidney beans, 2 tbsp. of cajun seasoning, and 1/2 cup of water. Let simmer uncovered for 15 minutes. Serve over brown rice.
 
Taco Soup: In a crock pot combine 1 lb. ground meat, 1 can of black beans, 1 can of diced tomatoes, 1 cup of frozen corn, 1 cup of water, and 1 package of taco seasoning. Cook on high for 3 hours or on low for 5 hours.
 
This month we spent $150 on groceries total! Using this meal calendar, planning for breakfasts and lunches, shopping only twice, and not going out to eat really made it easy to save lots of money. Next month, I'll share our meal calendar and shopping lists again!

Monday, February 25, 2013

Meal Planning Part 2

Week 1-2 of Meal Planning
 
Last time I started talking about how I've started planning our meals for the whole month. Now I'm going to share two week's worth of meals, recipes, and a shopping list! I have a good collection of about 12 recipes that are my "go-to's". They are easy, inexpensive, and our family loves them. For February, I planned lots of meals like this because I'm still getting used to mommy-hood. Also, as mentioned in my last post, I cook enough at once so that we can eat that for supper two nights! If you're family doesn't do leftovers, you'll have to add in some extra meals.
 
 
Week 1
Day 1/2: Baked Spaghetti
Day 3/4: Taco Night
Day 5/6: BBQ Chicken and vegetables
 
Week 2
Day 1/2: Chili with cornbread
Day 3/4: Stir Fry
Day 5/6: Taco Night
 
For the 7th day of each week, we either did a special date night at home with steak that we already had in the freezer or ate a freezer meal that I had made before our son arrived! Those have been so nice to have.
 
Shopping list for this round
Cost: Approximately $45 (I shopped at Aldi for the majority of the list)
  • 2 lbs. ground turkey (use whatever ground meat you like/that's on sale)
  • 1 bag of frozen chicken breasts or chicken breasts in bulk (you wont need it all this time, but will use it for the next half of the month)
  • 1 package of smoked sausage
  • Spaghetti Noodles
  • Jar of your favorite spaghetti sauce
  • 4 cup package of shredded cheddar cheese or block of cheddar to shred yourself
  • Frozen vegetables of your choice (broccoli and green beans are our favorite)
  •  2 cans of chili beans
  • 1 package of chili seasoning
  • Ingredients for cornbread (I have these on hand) or a package of box cornbread mix
  • 3 cans of diced tomatoes
  • 1 bell pepper
  • 2 onions
  • 2 packages of taco seasoning
  • 1 large jar of your favorite salsa
  • Tortillas
  • 1 can of black beans
  • 1 bottle of your favorite BBQ sauce
Recipes

I apologize for not having pictures. Meal time isn't what it used to be with a newborn! I will try by best to have some next time! :)
 
Baked Spaghetti: Cook noodles and brown 1 lb. ground turkey. Once turkey is completely cooked, stir in jar of spaghetti sauce and a can of diced tomatoes. Make alternating layers of  noodles and meat in a 9 x 13 dish. Top with 1 1/2 cups of cheddar cheese. Bake at 350 degrees for 30 minutes! Steam broccoli or have a salad on the side. This meal is also HUGE. So we sometimes eat it for 3 nights and/or have lunches.
 
Taco Night: This is possibly our favorite meal to have! It's so easy! Cook chicken breasts (I usually do 2-3 depending on size) in the slow cooker with 1/2 the jar of salsa, taco seasoning, and black beans for 2 hours or until chicken is done. Take the chicken out and shred with two forks. Put back in the slow cooker and stir together add 1 cup of shredded cheese before serving. Serve on tortillas with your favorite toppings. We sometimes put the mixture inside of a tortilla and grill/cook in a pan for a quesadilla instead!
 
BBQ Chicken: Another family favorite... cook chicken breasts in slow cooker with 1 bottle of BBQ Sauce. Take chicken out and shred. Serve with vegetables and rice or on a bun.
 
Chili: Dice and saute 1/2bell pepper and 1 onion. Brown 1 lb. ground turkey in a soup pot. Add 2 can of diced tomatoes, 2 cans of chili beans (don't drain!), and package of chili seasoning. Let simmer for 30 minutes. This can also be cooked in a slow cooker. Top with cheese and serve with cornbread!
 
Stir Fry: Cut smoked sausage into bit sized pieces. Slice 1/2 bell pepper and 1 onion. Saute sausage, pepper, and onion until the sausage browns. I serve this with brown rice. Sometimes I also add some kidney beans and Cajun seasoning.
 
The shopping list is the BASICS for the suppers. I always have a few things on hand that I can throw together like brown rice and whole wheat pasta, frozen vegetables of all kinds, flour and cornmeal for breads, seasonings and spices. These things help me make meals more flavorful and filling.


Thursday, August 16, 2012

Freezer Meals- Part III {Suppers}

This is Part III to my freezer meal plan. In case you missed Part I and Part II, you can read those now!

For all of the supper recipes, I used chicken tenders purchased from Sam's Club. I bought two large trays of chicken, and it was about 15-16 pounds total. I divided that evenly between all the freezer meals. For the suppers, you need gallon sized zip top bags. These meals were made for 2 people, but normally we have leftovers for lunch the following day. If your family is bigger, you may want to add more chicken and more vegetables. And as mentioned before, I used all chicken because I don't plan on eating these every night. If you want to eat your freezer meals every night, you may want to use different proteins. You can substitute pork chops, pork tenderloins, turkey tenderloins, or steak!

Supper Freezer Meals Shopping List
Chicken tenders or  breasts (15-16 pounds)
red pepper flakes
chili powder
paprika
thyme
ground ginger
jar of minced garlic
olive oil
honey
balsamic vinegar
3 cans of orange juice concentrate
large bag of carrots
4-5 bell peppers
green onions
4-5 onions
4-5 limes
soy sauce
peanut butter
dijon mustard
1 large container of chicken or vegetable broth
BBQ sauce (I used 2 bulk sized bottles)

I had a lot of the seasonings on hand, so I didn't have to purchase them. My total cost for the suppers was $75.27 = 3.01 per meal! Also, I used the Once a Month Mom website for my inspiration for some of these recipes. For the suppers, set out all of your gallon size bags, fold the top down, and divide your chicken evenly among them. Then add the ingredients below into each bag...

Honey Glazed Chicken (5 meals)
To be served with rice or on pasta

Chicken
2 tsp. red pepper flake
2 tsp. chili powder
2 tsp. paprika
1 garlic clove
1/2 honey
4 tbsp. balsamic vinegar
2 tbsp. chicken broth
3 chopped carrots

Peanut Chicken (4 meals)
To be served with rice

Chicken
1/2 onion, chopped
1/2 bell pepper, chopped
3/4 c. chicken broth
3 tbsp. peanut butter
1/2 tsp. lime zest
2 tbsp. lime juice
2 tbsp. soy sauce
1 tbsp. ginger
4 cloves garlic, chopped

BBQ Chicken (6 meals)
To be served with rice or on buns, after it is done cooking, shred the chicken

Chicken
1/2 onion, chopped
BBQ sauce, enough to cover chicken

Orange Chicken (4 meals)
To be served with rice

Chicken
3 large carrots, chopped
2 bell peppers, chopped
3 cloves of garlic, chopped
2 tsp. ginger
6-8 oz. of orange juice concentrate
2 green onions

Balsamic Chicken (6 meals)
To be served with pasta

Chicken
1/2 c. balsamic vinegar
2 tbsp. dijon mustard
1 tbsp. fresh thyme
1/4 c. olive oil

...After adding all the ingredients to the bags, zip the top up and use your hands to massage the ingredients into the meat and mix them all together. It's important that all the components are mixed well. Depending on your ingredients, you may notice that you need a little more liquid to cover the meat. If that happens, mix in a little extra broth or extra ingredients. Label each bag with the type of meal it is. Lay flat (to maximize freezer space) to freeze.

To cook your meal, simply take your meal from the freezer and add all the contents to your slow cooker. Cook for 2-3 hours on high. Cook some easy rice, pasta, or extra vegetables to enjoy with your meal. These meals were relatively easy to put together and took about 2 hours! And they are delicious! It is definitely worth our money to have these stocked in the freezer. We don't go out anymore, except on date night, and these are the perfect meals to enjoy on nights that I am just exhausted!

Saturday, November 19, 2011

Early Thanksgiving Tradition Part II

Today's post is all about gravy. Since I've been cooking Thanksgiving meals, my husband, Daniel, has learned to make some pretty amazing gravy. Everyone always raves over it and it has really become his specialty.   Gravy is one of those things that is kind of hard to cook. If you don't get it just right, it can turn out to be quite a mess. The method below allows you to add the flavorings that you want and helps you ensure that you'll have lump-free, amazing gravy every time. This is obviously NOT healthy. Everything in moderation, right?

This recipe makes 4-5 servings and should be doubled to serve a large family gathering.

What you'll need:
1 1/2 cups of drippings from chicken or turkey
1 c of water
1/2 c of all purpose flour
Seasoning and lemons that you used to flavor bird
Chicken Broth (as needed)

1. Place your drippings in a sauce pan and heat on medium heat. Use a slotted spoon to get out any large pieces. Add in about 1/2 c. of chicken broth to thin out. Bring to a low boil.


2. In the meantime, you can start working on your flour mixture. Add flour and water in a plastic container that has a lid. Now for Daniel's favorite part, put the lid on and shake vigorously for 2 minutes. 

3. Your flour/water mixture, known as a slurry in the food world, should be fairly thin and have no lumps. If there are lumps, continue to shake! 


4. Now, some people like their gravy thick and some like it thinner. You may not use all of the slurry and that's okay. This is all about making the gravy how you and your family enjoy it. Start by adding about 2 tbsp. of the flour/water mixture into your boiling meat drippings. Turn the heat down to medium low. Whisk around in the pan for about 1-2 minutes to allow it to thicken. Continue to add 2 tbsp. of the slurry mixture to make it thicker. If you get it too thick, add some chicken broth to thin it out.


I love being in the kitchen with him.

5. Continue to whisk and add the slurry as needed. Once you get it to the thickness you want, add 1 tsp. lemon juice, 1 tsp. pepper and salt, and about 1 tsp. total of seasonings that you used on the turkey/chicken, in this case, rosemary and a bay leaf. Continue to cook the mixture for about 5 minutes after you get it to your desired consistency.

Now, this gravy is really my favorite. The lemon and rosemary from the chicken really put it over the top. This gravy is topping my dressing. You'll have to come back in a couple of days to learn how to make it. :)

Thursday, November 17, 2011

Early Thanksgiving Tradition Part I

Dan and I love Thanksgiving. We love the time with family and all the food that we get to enjoy. Every year, we normally cook a small Thanksgiving dinner for ourselves to test out new recipes and practice our specialities to get ready for the real thing. I've cooked our Thanksgiving meal for Dan's family for the past 3 years, so this has become quite a tradition for us. It's a sweet time to cook together, without the hurry or other people, and just enjoy each other's company. We also usually try to make it as healthy as possible. Over the next few posts, I'll share with you some of our recipes for the holidays.
In this post, I'll share how to cook a delicious Thanksgiving bird. When we cook our little early Thanksgiving dinner, we don't cook turkey. We normally cook a chicken instead, mainly because you can buy them much smaller- since its just the two of us. This recipe could (and will at our Thanksgiving) be used on a turkey. The recipe will just need to be doubled (or tripled, depending on the size of your turkey).
What you need:
1. Chicken or Turkey
2. Balsamic Vinegar
3. 3 Bay Leaves
4. 3 Lemons
5. 2 tbsp. Rosemary
6. 1 tbsp. each of salt and pepper
7. An extra set of hands for seasoning the bird :)

 
 1. Remove any giblets or neck from the inside of the bird. Drain out any excess liquid and pat dry.
2. Sprinkly half of the salt and pepper inside the chicken/turkey. Pour in about 2 tbsp. of balsamic vinegar. Cut the lemon into quarters and place inside of bird along with bay leaves. Make sure the inside is completely full.

Note: You can not taste the vinegar. It acts as a great tenderizer, without the added calories or chemicals.

3. On the outside, use your fingers to separate the skin from the meat, being careful not to tear it. Inside of the skin, pour in about 2 tsp. of balsamic vinegar,  1 tsp. of salt and pepper, and about 2 tsp. of rosemary.
4. Use vinegar, remaining rosemary, and remaining salt and pepper to coat the outside, both top and bottom.


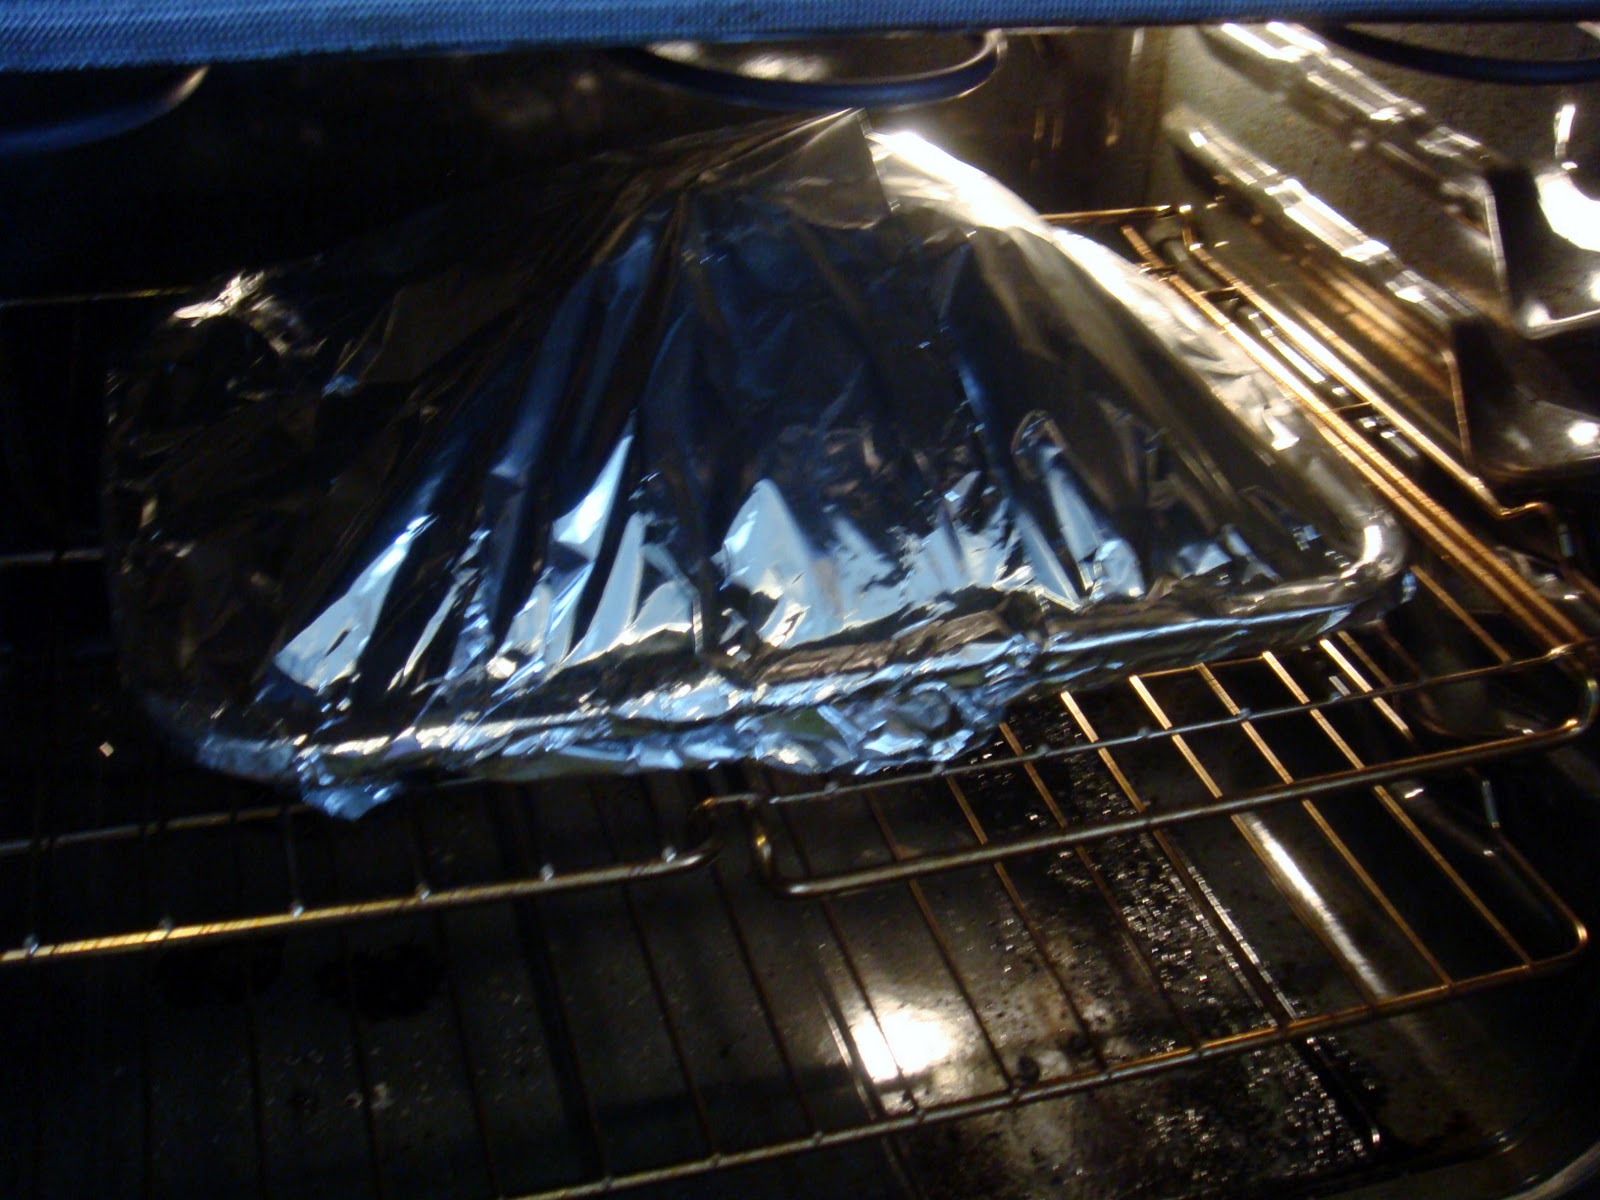
5. Place in a roasting pan (allows the drippings to fall away; makes for a healthier version). Tightly wrap the pan with foil.


To cook poultry, the rule is to cook it for 20 minutes per pound on 350 degrees. For example, this chicken weighed 4.81 pounds, so 20 x 4.81 is  96.2 minutes. Because I cook it for 15 minutes on 425 degrees, I can take off a few minutes (no more than 15). Cook your bird for the majority of the time at 350 degrees. For the last 15 minutes, remove the foil and cook at 425 degrees. I cooked this chicken for 1 hour, 15 minutes on 350 with foil, and then 15 minutes without foil on 425. Whatever your cooking time ends up being, make sure that when you're done, the juices from between the leg and the breast run clear.


 6. Remove from oven and allow to rest for at least 15 minutes. This allows the juices to redistribute throughout the bird and assures that you will have a really moist chicken or turkey all the way through.

Make sure you save the drippings in the roasting pan for gravy! In the next post, I'll show you how to make amazing, fool-proof gravy.


Thursday, July 28, 2011

Chicken Tenders

 I love Chicken Tenders. When I go out to a restaurant and can't decide what to order, I will usually just get chicken tenders! They are always good. However, they are not always good for you. In order to quench my craving for the fried deliciousness, I started making them at home! I use panko bread crumbs to make them extra crispy- without the frying! They are much better for you and equally tasty! 

What you'll need to make about 10-12 chicken tenders:
Chicken tenders or chicken breasts cut into strips. 
1 cup corn meal
2 eggs
2 cups Panko bread crumbs
Grill seasoning (if your grill seasoning has salt in it, don't add extra)
Salt
Three dishes (shown below)

 Set up your stations. In the first plate, add the cornmeal. In the second, crack and whisk the eggs. In the third, add panko bread crumbs. Springle 1 1/2 tsp. of grill seasoning in cornmeal and 1 tsp. grill seasoning in panko. Add 1 tsp. of salt to cornmeal. 

 Take each chicken tender and go through each bowl- starting with cornmeal, then eggs, and then the panko bread crumbs. After the cornmeal and eggs, shake off any excess. Make sure the panko break crumbs completely cover each chicken tender.

 Place on a baking sheet that has been sprayed with non-stick olive oil. Make sure they are not touching. Bake at 350 for 10 minutes. After 10 minutes, take out and flip over. Bake for an additional 10-12 minutes until golden brown.


Serve with your favorite dipping sauce and enjoy!