Pages

Showing posts with label Baked Food. Show all posts

Tuesday, December 20, 2011

Easy Entertaining Part II: Baked Brie

In my [short] experience in hosting parties and family holiday get-togethers, I've learned that appetizers are normally the last thing on my mind. I somehow always overlook them until the last minute. It's not always necessary, but it seems like every time I'm cooking a big meal, I'm running a few minutes late, and it would work perfectly to have one or two small appetizers to have my guests enjoy while I'm finishing the main course. Last year, I tried baked brie for the first time. This summer, I was hosting a dinner party for our small-group with church. Appetizers were not at the back of my mind for once, I decided to try making brie as one. It was such a huge hit and everyone devoured it in minutes. Now, this has become my go-to appetizer and I serve it at most of the parties and get-togethers I host. It's super easy and can be your go-to appetizer too. It is the perfect food to take to a party or to serve at your own home.

For Baked Brie you will need:
1 sheet of thawed puff pastry (found in the freezer section)
8 oz. package of brie cheese
drizzle of honey
fruit slices, crackers, and/or bread for serving along side the brie

Brie is found with the speciality cheeses at regular grocery stores. It normally comes in a little box and is wrapped inside.

For the easy part, take your puff pastry sheet and wrapped the brie as neatly and tightly as you can. There is no need to tear off the extra dough. Place in a greased baking pan with sides (just in case some cheese oozes out, it would end up in the bottom of your oven). Bake at 350 degrees for about 25 minutes or until the pastry is golden brown.

Remove the baked brie from the oven and immediately drizzle 1-2 tbsp. of honey over the top. I've raved about Savannah Bee Company honey before, and this is another one of my favorite ways to use it. I chose the winter white honey since this was for a Christmas party!
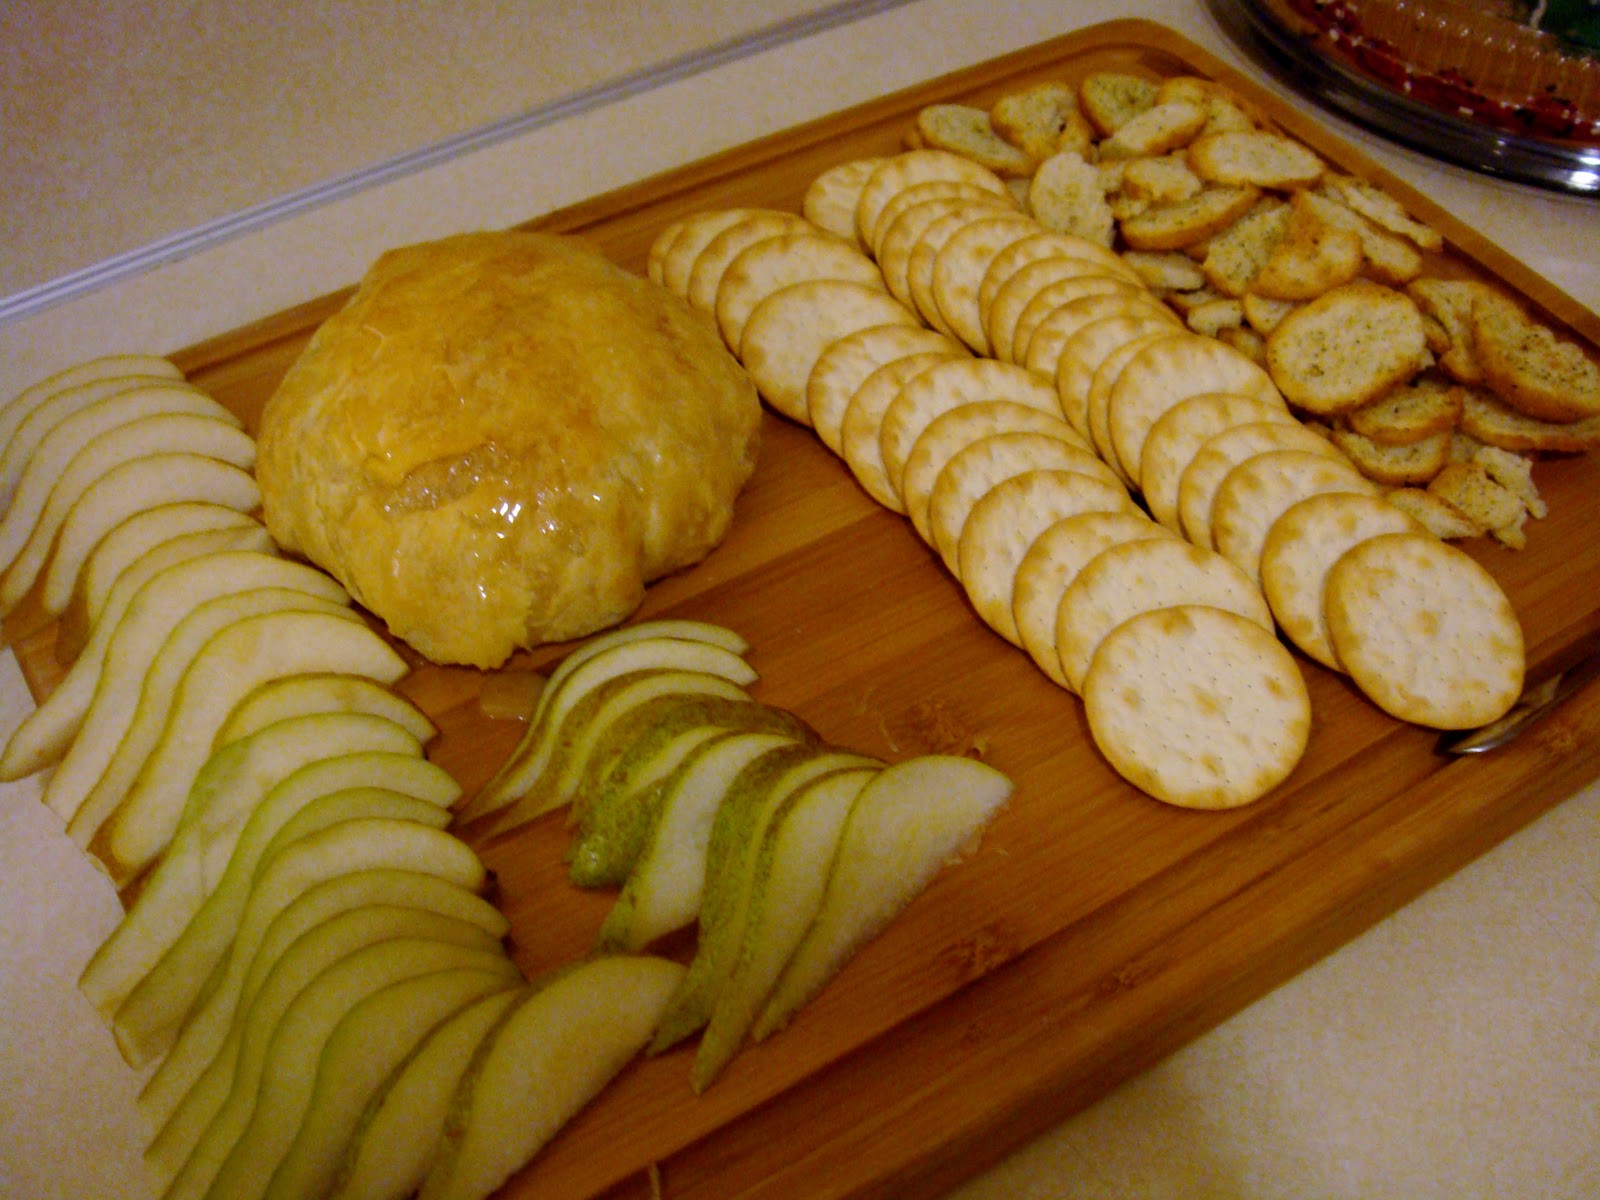
 Place the cheese on a large serving board with lots of sides to enjoy the brie on. The best choices that I've found are pears, apples, blueberries, water crackers, and pita chips. Of course, you can enjoy this on whatever you like. Also serve with a small butter knife to cut into the pastry. It is warm, gooey, slightly sweet deliciousness inside!


 This Christmas and New Year's, if you're hosting a party or need to take something to a party, this is a simple and wonderful appetizer that everyone is sure to love.


Saturday, December 17, 2011

Easy Entertaining Part I: The Perfect Pie Crust

The 2011 holiday season is now in full swing! It is amazing how quickly it has passed already. I love Christmas (maybe a little too much) and like to enjoy it as long as possible. We put our tree up in early November and can hardly believe that I'm just 2 weeks away from having to take it down. As we all know, with the holidays come parties and family get-togethers. Over the next few days, I'm going to share a few posts about easy dishes to cook and ways to make your parties and get-togethers go smoothly and easy. A quick disclaimer: the next few posts will not stick to my normal theme of healthy eating!
The first post is all about how to make a perfect pie crust. Most people have a favorite pie recipe that they like to make. It is the perfect dessert to take to a party or serve at your own family's get-together. I'm not going to try to sway your opinion on the best pie. I am going to share with you how to make your pie even better. This pie crust is so easy and so much more delicious than a store bought one. I've found that people don't normally have a problem making a pie crust, it's the rolling it out, getting it in the pan, and baking it that is difficult. I always use the Crisco brand recipe for pie crusts. It's really flaky and delicious so I'm not going to reinvent the wheel with this one.

The perfect pie crust:
Crisco pie crust dough prepared and formed into a ball  (link above)
A large, clean workspace (granite counters or a large cutting board work great!)
Rolling pin
Spatula or another utensil that is very thin (I use a pie server)
Pie cooking dish
Uncooked beans
Aluminum foil
Extra flour

1. Prepare the pie crust according to Crisco's recipe. Form into a ball and wrap in plastic wrap. Allow the dough to chill in the freezer for about 30 minutes. You can also do this a few days ahead of time and place in the refrigerator until you are ready to use it.

2. While the dough is cooling down, place your cutting board, rolling pin, and thin utensil in the freezer as well. You want as much of your equipment as possible to be very cold.


 3. The key to keeping the dough from sticking is to have a small layer of flour between the dough and your working surface. Place about 3 tbsp. of flour on your board/counter and then your ball of dough. Cover any area of your working space that the dough might touch with flour.


 4. Spread some flour on your rolling pin and use it to begin to roll out your dough. Start from the center and roll outwards pressing firmly. Always come back to the center to roll out. If the rolling pin begins to stick, dust it with some more flour. Using your pie dish to measure, roll until it is about 1/8 of an inch thick and where you have enough to go 2-3 inches past your circular pie dish.

 5. Now begins the transfer of the dough into your pie dish. Carefully begin lifting up. Begin to gently roll the doll onto the rolling pin. Use a spatula to carefully unstick any parts that may stick.

 6. Roll the dough completely up on the the rolling pin. Set it on the pie dish and unroll onto it.

 7. Use your hands (if it begins to stick, put a little flour  on your hands) to press the crust down into the pan. Here, you can use two fingers to form a nice rim. I had something else in mind for this one. You'll see below. If your pie crust doesn't need to be cooked before you add the filling (usually fruit pies do not), you are done! Add your filling and bake according to your recipe. If your pie crust needs to be cooked before the filling is added or if you just want to ensure that the crust is not mushy, continue with this recipe.

 8. Place a layer of aluminum foil on top of the pie crust and then a layer of the uncooked beans. Make sure the beans cover the entire bottom. Bake at 350 degrees for about 12 minutes or until the crust is beginning to brown. It will continue to cook once you add the filling and bake again.

9. Instead of a normal rim, I added leaves to this pecan pumpkin pie. Using some left over dough, I cut out the leaves and added them to the pie as the pecan filling was cooking.

Now, if you don't have a favorite pie recipe, this Pumpkin Pecan Pie is my absolute favorite during the holidays. I also substitute sweet potato pie sometimes in this recipe. Also, another easy way to jazz up a regular pie crust for extra flavor is to add about 2 teaspoons of the spices or chopped nuts from your pie recipe.

This recipe will make your regular pie recipes a little more special.

Monday, November 21, 2011

Early Thanksgiving Tradition Part III

For the past few days, I've shared some of my favorite recipes from a tradition that my husband and I enjoy every year. You can read the first two posts here and here. For my last post of our early Thanksgiving Tradition that we celebrated a few weeks ago, I'm sharing my recipe for dressing. This is definitely my Southern side, but down here, we don't call it stuffing. It's dressing; our rational for that is that it dresses the turkey on the plate. I also do not make it with bread, but with cornbread. Just another testament to my deep Southern roots, until I started watching Food Network about 4 years ago, I did not even know that there was a such thing as so called "stuffing" made with bread. Whatever you call it, it's a must on every Thanksgiving table.

I love dressing. I usually end up making it sometime in May or June, just to get a fix to hold me over until the holidays. If you're Northern, or someone (like many of my friends) who was raised by Northern parents in the South, you should give this dressing a try. It's very simple, and it's very different, in a good way, if you've never tried it! If you're Southern and have enjoyed dressing many times, give this one a try to enjoy the comfort of dressing as a part of your weeknight meal. It makes any meal special.

This recipe makes 4-5 servings and can be doubled.

 
 For the cornbread, you'll need:
1 1/2 c. Self-rising Cornmeal Mix (I swear by the Tendabake brand)
1 egg
3/4 c. milk
1/4 c. olive oil 
2 bay leaves
1 tsp. ground sage
1/2 tsp. salt and pepper

 1. Mix all ingredients together in a large bowl. Add in the bay leaves. You will pull them out when you start to make the dressing.

 2. Put in a greased 8 x 8 pan and bake at 400 degrees for about 25 minutes or until a toothpick comes out clean from the center. The mixture should be fairly thin in the pan, it allows for it to dry out faster.

Place cooked cornbread on a drying rack and allow to sit out for at least 4 hours.

Sadie likes to sit on the bar stool while I'm cooking. So cute!

For the dressing, you'll need: 
Cooked cornbread
1/3 c. chopped celery
1/4 c. chopped carrots
1/3 c. chopped yellow onion
3-4 c. chicken broth
1/3 c. panko bread crumbs
1 egg
1 tsp. sage
1 tsp. of salt and pepper

 1. Chop up your vegetables into small pieces. 

 2. Saute the vegetables over medium-high heat in about 1 tsp. of olive oil. Add sage, salt, and pepper. Stirring occasionally, cook for about 10 minutes or until vegetables are tender.


 3. While your vegetables are cooking, crumble up your dried cornbread. Don't forget to remove those bay leaves!
4. Once vegetables are done, add them along with the egg and panko bread crumbs to the cornbread crumbs. Stir together well. 
5. Add 2 cups of chicken broth. Stir together. The mixture should be thoroughly wet, but there should not be any standing liquid. Add more chicken broth as needed so that the mixture is wet all the way through. This amount is different every time, depending on how dry the cornbread is. Mix well.


5. Spread in a greased dish. Bake at 350 for 35 minutes. If you are doubling this recipe, you'll want to use a bigger casserole dish and bake for about 45 minutes.


 Enjoy with gravy on top! 

 Whether you are Southern to the core, like me, or if you have never even heard of cornbread dressing (and think I'm a little weird for calling it dressing), I hope that you enjoy this Southern staple!

Sunday, September 11, 2011

Pumpkin Bread

After a long, hot summer, fall always seems so refreshing. The bright blue skies, chilly mornings, and changing leaves are so wonderful after being scorched for months. One of my favorite things to do in the fall is bake. I love for the house to be filled with the smells of pumpkin and spices. This is my recipe for pumpkin bread. It is about as healthy as it gets when it comes to bread! It is sure to make your house smell heavenly and it tastes as good as it smells!


What you'll need:
15 oz. can of plain pumpkin
1/4 c. oil (I use Smart Balance, but you can use vegetable or canola too)
1/3 c. water
1 egg + 1 egg white
1 c. sugar
1 3/4 c. all purpose flour
1 tsp. baking soda
1 tsp. baking powder
1/2 tsp. salt
1 tbsp. pumpkin pie spice
1 tsp. vanilla
1 c. pecans


 1. In a large bowl, mix the flour, baking powder, baking soda, spice, and salt together. In a separate bowl, mix the pumpkin, sugar, eggs, vanilla, water, and oil together.
  

2. Add the 1/3 of the wet mixture to the dry ingredients and mix just until combined. Add another third of the wet into the dry and mix again. And repeat again so that all of the ingredients are in one bowl now. Mix just until combined. Gently stir in the pecans.
3. Put mixture into a greased loaf pan. The size doesn't matter too much, it'll just vary your cooking time. This silicone pan was a 7 x 3. Fill mixture about 3/4 of the way to the top. If you have extra mixture, pop it in a muffin tin and have a few muffins!

4. Bake at 350 for about 50 minutes (cooking time will vary if using a different size pan) or until a toothpick comes out clean from the center.

Hope you have the smells of fall running through your house soon.

Thursday, July 28, 2011

Chicken Tenders

 I love Chicken Tenders. When I go out to a restaurant and can't decide what to order, I will usually just get chicken tenders! They are always good. However, they are not always good for you. In order to quench my craving for the fried deliciousness, I started making them at home! I use panko bread crumbs to make them extra crispy- without the frying! They are much better for you and equally tasty! 

What you'll need to make about 10-12 chicken tenders:
Chicken tenders or chicken breasts cut into strips. 
1 cup corn meal
2 eggs
2 cups Panko bread crumbs
Grill seasoning (if your grill seasoning has salt in it, don't add extra)
Salt
Three dishes (shown below)

 Set up your stations. In the first plate, add the cornmeal. In the second, crack and whisk the eggs. In the third, add panko bread crumbs. Springle 1 1/2 tsp. of grill seasoning in cornmeal and 1 tsp. grill seasoning in panko. Add 1 tsp. of salt to cornmeal. 

 Take each chicken tender and go through each bowl- starting with cornmeal, then eggs, and then the panko bread crumbs. After the cornmeal and eggs, shake off any excess. Make sure the panko break crumbs completely cover each chicken tender.

 Place on a baking sheet that has been sprayed with non-stick olive oil. Make sure they are not touching. Bake at 350 for 10 minutes. After 10 minutes, take out and flip over. Bake for an additional 10-12 minutes until golden brown.


Serve with your favorite dipping sauce and enjoy!